Yes, Cayenne on Arduino. The same Cayenne we've covered in the past can also be installed on, among many others, an Arduino board. Today we'll be covering the installation process.
Hardware
First, you'll need compatible hardware. The two basic things you need are the micro-controller itself and a network interface card. We used an Arduino Uno (rev. 3) and a SeeedStudio Ethernet Shield (v1.1). Cayenne is compatible with a wide range of other network cards and Arduino boards as well; check their site for full compatibility list. You also of course need a network to connect to, either wireless or wired, and a power source. If you plug into a computer, you can use the serial monitor to view debugging information.
Follow the prompts to select your board and network card(A SeeedStudio ethernet shield is equivalent with a W5100)
Open Arduino IDE
Install Cayenne Library
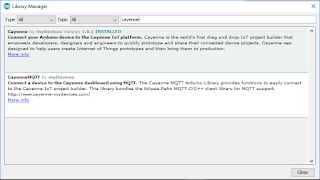
Go to Sketch=>Include Library=>Manage Libraries
Search for Cayenne and install
Copy and paste the code from Cayenne into Arduino IDE
Compile and upload (this can take some time)
Optional: Serial debug
If you're Arduino is connected to a serial port, you can open the serial monitor and view the board's status
Log into Cayenne and start using your Arduino!
After successful installation, you may receive an email confirming the device was setup:
Conclusion
Now with Cayenne on your Arduino board, simply set it up anywhere with internet and power to be able to remotely and autonomously toggle pins on and off. Just be aware that depending on your network card, certain pins on the Arduino may be unusable, such as pins 13, 12, and 11 in our setup. Stay tuned to CodePy for more tech tutorials!
About Cayenne Cayenne is an IOT cloud program to assist you in quickly building automated projects with the Raspberry Pi, Arduino, and other boards. You can the easy to use graphical interface to manually control pins, view live sensor data, and set up automated responses to run based on time or events. It also let's you remote control the device in a way similar to a VNC server. Cayenne may no be for everyone though, on some board models the program takes up 100% of the processing power constantly. But not to worry, the program is almost as easy to uninstall as it is to install. This tutorial will walk you through the installation process for Raspbian. Installation Android App Cayenne is best used with the companion Android and iOS apps. After opening the app, it will walk you through logging in (or creating an account) and autonomously locate and install your Pi. After it scans the network, click your Pi and enter the username and password (Default Raspbian Username:...
Weaved is a free service that allows you to temporarily open local ports to the public internet without the need for re-configuring a firewall. Learn more at their website . Security In any setup, it's a good idea to change the default password. Weaved exposes your Raspberry Pi to the internet, making it necessary to change it. The first step before installing Weaved should be changing your password. On the Raspberry Pi, open a terminal and enter the command: passwd The system will ask you to confirm the old password. The Raspberry Pi's default password is "raspberry". Then enter your new password twice. Remember, as a security enhancement, UNIX-like systems don't show your password as you type. It it also a good idea to add a root password. You can do this by running sudo passwd By default, there is no root password, and this password can be the same as the first one. Getting Started with Weaved In order to use Weaved, you need to make an account. T...
Raspbian Jessie uses a different network manager than most other Linux systems and previous versions of Raspbian. Most users will have no use for a static IP, but it is necessary in some environments. There is a lot of confusion online, but this method has been tested to work with the newest edition of Raspbian as of August 8th, 2016. Also please note, depending on what you need a static IP for, it may be easier to go into your router(or other DHCP server) and specify an IP for your device there. First, open /etc/dhcpcd.conf with your favorite text editor(We'll use nano). Run the command: sudo nano /etc/dhcpcd.conf Add this to the end: interface eth0 static ip_address=192.168.1.7/24 static routers=192.168.1.1 static domain_name_servers=8.8.8.8 Use Ctrl+X to save and exit Replace ip_address with an IP of your choice, routers with the IP of your router or gateway, and domain_name_server with the IP of a DNS server. If you're on Wi-Fi, change "eth0" to...


Comments
Post a Comment